As an Amazon Associate, we earn from qualifying purchases. Some links on this site are affiliate links at no extra cost to you. Our recommendations are based on thorough research and editorial judgment.

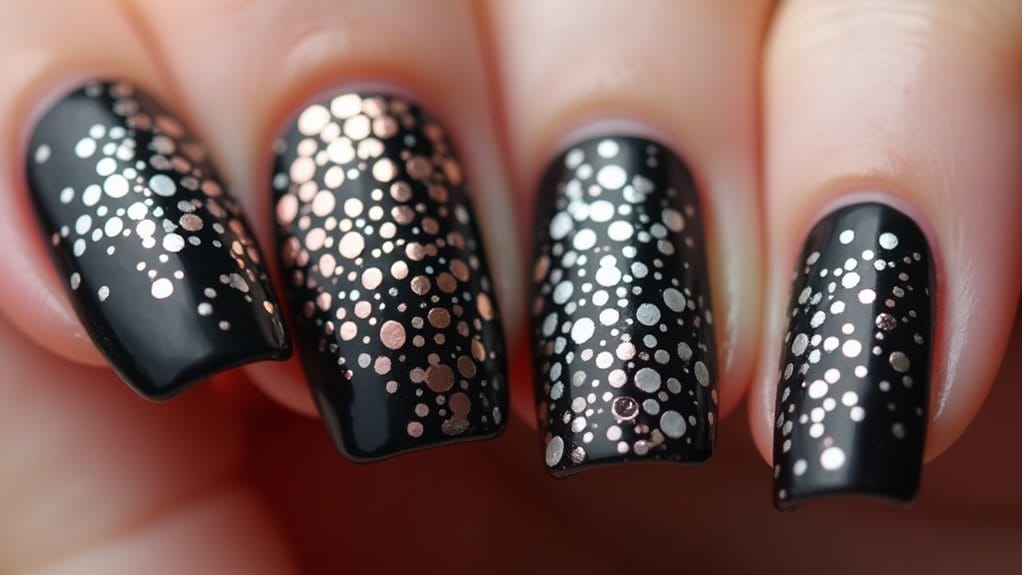
Creative Dot Patterns For Stunning Nail Art

Transform your nails into stunning works of art with creative dot patterns that you can easily master at home. You'll need quality dotting tools, vibrant polishes, and a steady hand to create everything from simple polka dots to intricate mandalas. Start with basic patterns like evenly spaced dots, then progress to seasonal designs featuring festive color combinations like white snowflakes on deep blue or cheerful spring florals. Mix different dot sizes and combine them with geometric shapes for modern appeal, or try ombre effects by blending dots from light to dark shades. Discover how these versatile techniques open up endless possibilities for your nail art journey.
Key Takeaways
- Create stunning floral designs by arranging dots in circular patterns, starting with a center dot and radiating outward.
- Mix dot sizes and colors for ombre effects, blending three to four shades from light to dark for depth.
- Place dots along the cuticle line with contrasting colors to frame nail art with elegant, eye-catching borders.
- Combine geometric patterns with dots by arranging them in triangles, squares, or diagonal lines for modern designs.
- Layer different-sized dots strategically with negative space to add dimension and create sophisticated, professional-looking patterns.
Essential Tools for Dot Designs
The right tools make all the difference when creating stunning dot patterns on your nails. You'll need a variety of essential tools for dot designs to bring your creative visions to life, starting with a quality dotting tool that comes in multiple sizes for versatile pattern creation.
Begin with a base coat to protect your natural nails and create the perfect smooth canvas for your artwork. You'll want to select high-quality nail polish in various colors that'll mix and match beautifully, ensuring your dots stay vibrant and long-lasting. Don't forget your nail art brushes, especially fine-tipped ones, which you'll use to add intricate details and embellishments around your dot patterns.
To achieve professional-looking results, you'll need reliable clean-up tools like acetone and detail brushes to fix any minor mistakes along the way. Finally, seal your masterpiece with a glossy top coat that'll protect your design while adding that perfect shine. With these tools at your fingertips, you're ready to create everything from delicate polka dots to bold, eye-catching patterns that'll showcase your creativity.
Recommended Products

Fine Craftsmanship, Flawless Nail Art - Joya Mia’s professional Kolinsky acrylic nail brush is meticulously crafted from 100% pure Kolinsky hair. This nail brush for acrylic nails ensures precision and accuracy in every stroke, allowing you to create intricate and flawless designs effortlessly.
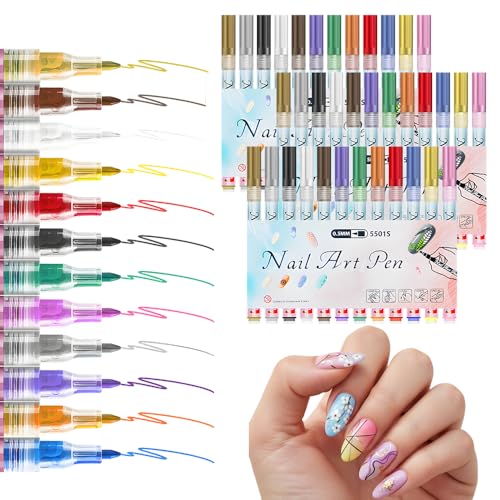
✨【Precision Detailing for Creative Nail Art】The 0.5/0.7mm fine tip nail art pen is ideal for drawing intricate designs, such as flowers, lines, dots, butterflies, and gradient colors. This nail liner pen enables detailed nail painting and allows you to personalize your manicure style at home with ease.

【100 Colors Gel Nail Polish Set】 Beetles gel nail polish kit includes 100 carefully selected gel colors in multiple finishes: 50 classic color gels, 20 glitter gels, 20 cat eye gels, and 10 pearl gels, all in 5 ml bottles. The set also comes with a 7.5 ml base coat, glossy top coat, matte top coat, glitter top coat, pearlescent top coat, easy-removal base coat, and essential nail art tools for creative DIY manicures.
Basic Dotting Techniques and Patterns
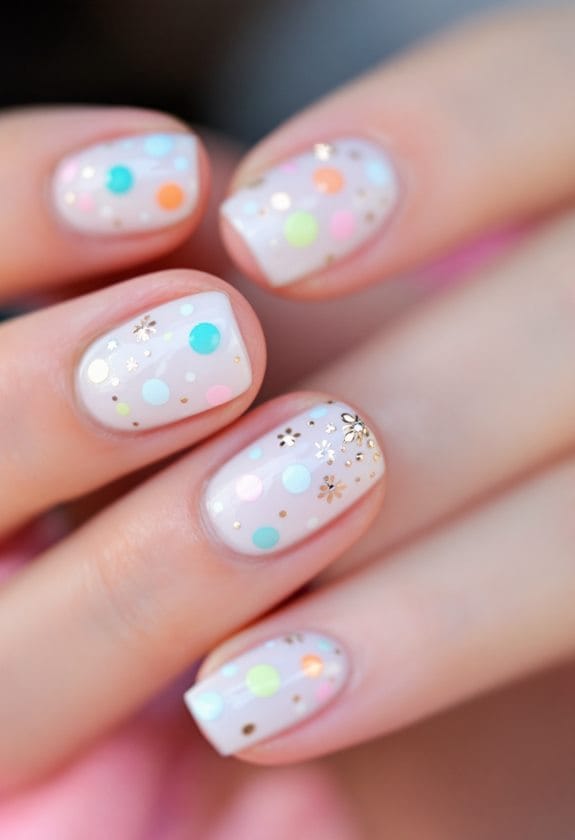
Now that you've gathered your tools, mastering basic dotting techniques will open up endless possibilities for nail art designs. The key to creating stunning dot nail art starts with mastering the fundamentals of pressure control and spacing, which will help you achieve professional-looking results every time.
Begin your dotting journey by practicing simple polka dot patterns on each nail, making sure to space your dots evenly for a clean, balanced look. You'll want to experiment with different dot sizes by adjusting the pressure you apply with your dotting tool, creating dynamic designs that catch everyone's eye. When you're ready to advance your skills, try creating beautiful ombre effects by gradually blending dots from light to dark shades.
Remember to choose color combinations that make your designs pop – think bright pink dots on a crisp white base, or classic black dots on a neutral background. Take your time with each dot, maintaining steady pressure and consistent movements to prevent smearing. As you practice these basic techniques, you'll develop the confidence to create more intricate patterns and unique dot combinations.
Recommended Products

CONTENTS This package includes 10,000 Manicure/Pedicure Sticks bamboo cuticle pusher / remover sticks

【Beetles 100 Colors Gel Nail Gift Set】Beetles gel nail polish set includes 100 carefully selected gel colors in multiple finishes: 50 classic color gels, 20 glitter gels, 20 cat eye gels, and 10 pearl gels. The kit also comes with a base coat, glossy top coat, matte top coat, glitter top coat, pearlescent top coat, additional base coat, and essential nail art tools, giving you more ways to create DIY manicures at home.

Beetles 60 Colors Gel Polish Set with Storage Bag: This beetles gel nail kit, you will get 60 classic and fashionable colors , 1 x 7.5ml gel base coat and glossy & matte Top Coat, 1× peel off base coat, 2×glitter top coat,1 x Nail Buffer , 1 x Curved Nail File, 1 x Nail Clipper, 3xColor palette, 1 x Color number sticker, 1 x Cuticle Stick, with all in one storage bag, which isasy to store, no mess! These beetle gel nail polish match any look for casual days, gatherings, or ceremonies.
Color Combinations That Pop
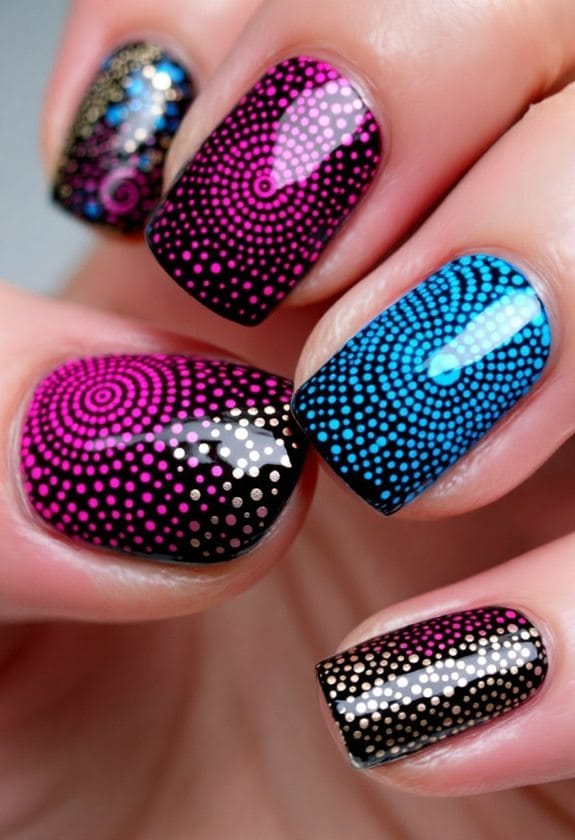
From bold neons to classic neutrals, choosing the right color combinations can transform your dot nail art from simple to spectacular. When you're looking to make a statement, try pairing neon orange with purple dots for an energetic, party-ready look that's sure to turn heads.
For those who prefer timeless elegance, you can't go wrong with a classic black and white color combination, which creates a sophisticated pattern that works beautifully for any occasion. If you're embracing the fall season, consider combining rich burgundy with black dots for a luxurious, autumn-inspired manicure that perfectly complements your cozy sweaters.
Want something modern yet understated? A sheer black base topped with marigold yellow dots offers a contemporary twist that's perfect for warmer months. For everyday wear, you'll love the softness of nude polish decorated with baby blue dots, creating a gentle, feminine look that's office-appropriate yet stylish. Each color combination brings its own personality to your nail art, allowing you to express yourself while maintaining a polished appearance that suits your style and the occasion.
Recommended Products

28Pcs Same Color Same Bottle Gel Polish: 24pcs 15ml gel polish for all season,2pcs clear top coat and 1 pcs base coat and 1 pcs building gel, need to be cured under UV or LED Lamp for 60-120s. Must apply with Base Gel and Top Coat. This collection will come with neon jelly green yellow hot pink red blue purple orange milky white black for Spring Summer .Please shake the bottle or warm it with hot water before use, to acheive a better effect.

Cuckoo Pro Powder Polish Dip System: So So Fun Collection

Super brightness: Combo beam with triple row and nest reflector cup design in the middle for extreme light efficiency
Seasonal Dot Design Ideas
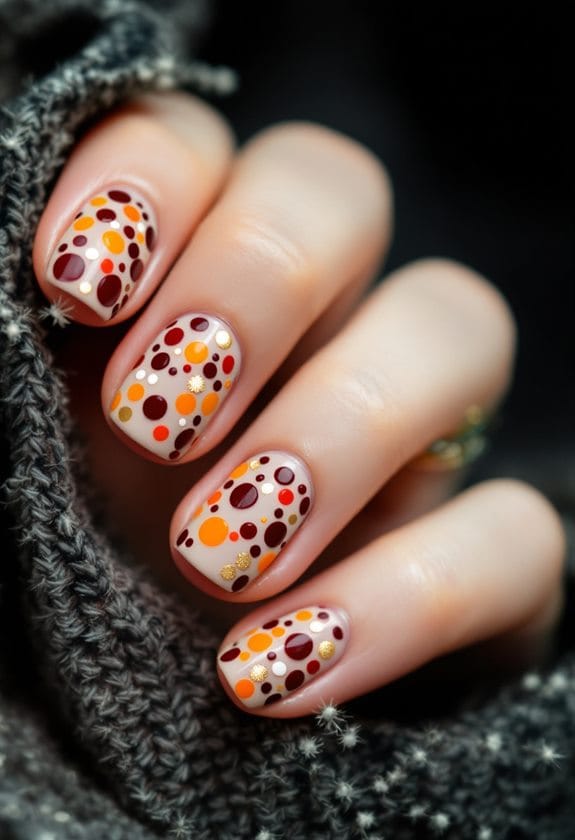
Building on your color mastery, you'll love exploring how dot designs can change with each passing season. These versatile nail art designs transform your manicure into a perfect reflection of nature's changing palette throughout the year.
When winter arrives, create magical snowfall scenes by placing white dots on deep blue or black polish, giving your nails a cozy, festive feeling that's perfect for holiday parties. As spring blooms, arrange cheerful dots in pink, yellow, and purple to form delicate flower patterns that celebrate nature's renewal. You'll find summer's the perfect time to experiment with vibrant, bold dot combinations that capture the season's energy and warmth.
Fall brings opportunities to work with rich oranges, browns, and deep reds, while Halloween lets you play with spooky-cute designs using orange and black dots paired with fun holiday motifs. During the Christmas season, you can't go wrong with classic red and green dot patterns enhanced with sparkly metallic accents. Each seasonal nail art design offers endless possibilities to express your creativity while staying perfectly on-trend with the time of year.
Advanced Dotting Art Methods
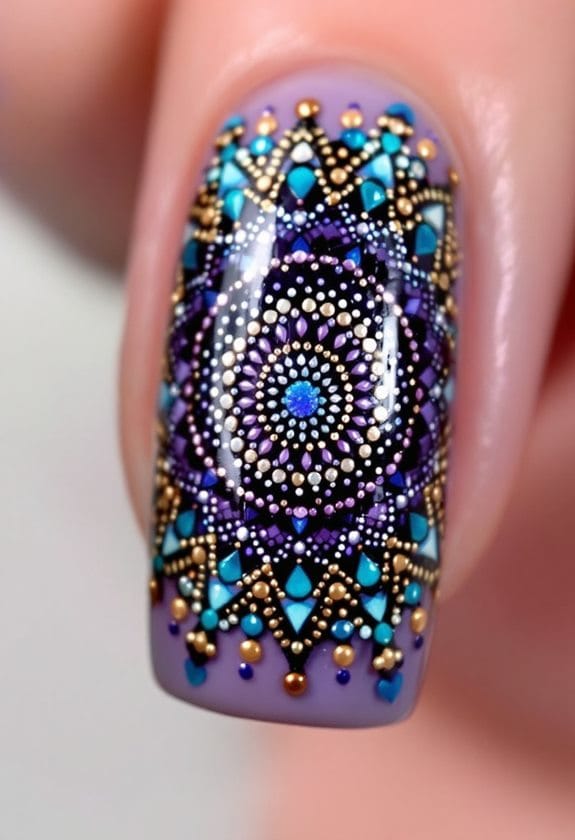
Once you've mastered basic dotting techniques, you'll discover a world of advanced methods that elevate your nail art to new heights. Using a dotting tool with multiple ends opens up exciting possibilities for creating intricate patterns, from delicate flowers to mesmerizing mandalas. By varying the size and spacing of your dots, you'll add depth and dimension that make your designs truly pop.
Take your art to the next level by experimenting with color gradients, creating stunning ombre effects that shift smoothly from one shade to another. You'll find that layering different dot sizes adds incredible depth to your designs, while strategic placement of negative space creates modern, eye-catching looks. Try holding your dotting tool at various angles to achieve unique textures and patterns that'll set your nail art apart.
These advanced methods require practice and patience, but the results are absolutely worth the effort. Focus on maintaining consistent pressure when creating your dots, and don't be afraid to mix techniques to develop your signature style. With these sophisticated dotting methods, you'll create professional-looking designs that showcase your growing expertise.
Recommended Products

48 Vibrant Colors: SAVILAND nail art pen set offer 48 vibrant shades—perfect as nail art markers for women or DIY enthusiasts! Use these nail pens for weddings, parties, holidays and more. Ideal nail art pens for painting nails with endless DIY creativity

24 Colors Nail Art Pens: The MelodySusie 24-Color Nail Art Pen Set includes a wider range of colors, designed for exquisite nail art creation. Suitable for beginners and professionals, different color combinations can design detailed and diverse nail art patterns. With these nail art tools, you can unleash more nail art creativity.

70Pcs Acrylic Nail Kit with Everything: This complete acrylic nail set includes everything you need: nail drill, U V lamp, 11 colors acrylic powder, 3pcs gel polish, 24pcs glitter powders, nail art rhinestones, base top coat, 100pcs nail tips, and other essential acrylic nail supplies. Create your favorite DIY nail art designs at home with this nail kit acrylic set.
Classic Polka Dot Variations
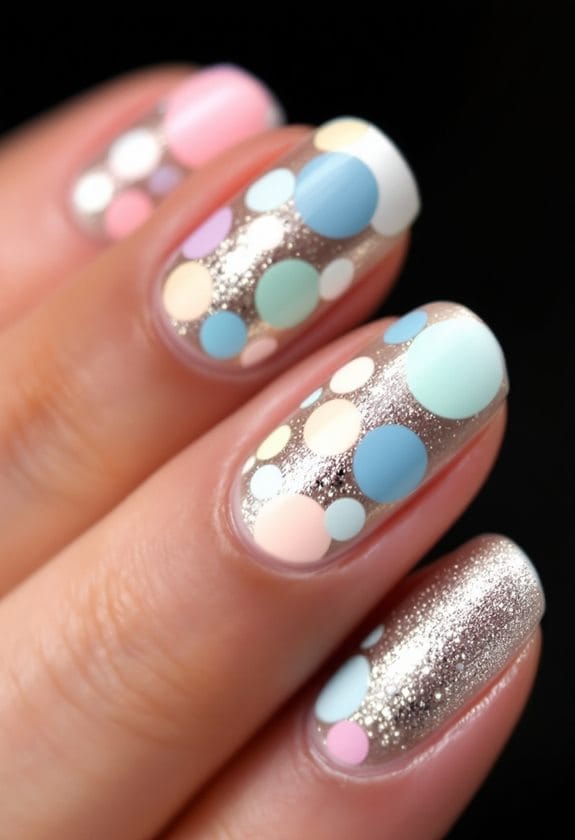
Standing the test of time, classic polka dot patterns remain a cornerstone of nail art design. You'll find these charming dots arranged in countless variations, from perfectly aligned rows to playfully scattered arrangements that bring life to your nails. Whether you're using small, delicate dots or bold, statement-making circles, there's a polka dot style that's perfect for your personality.
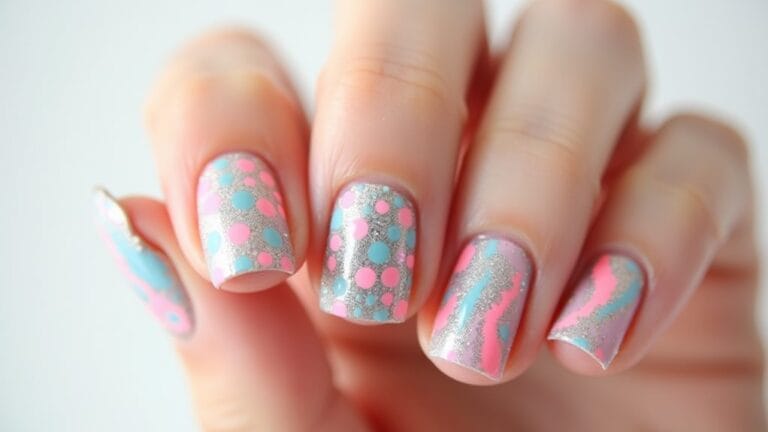
You can create stunning combinations by mixing different dot sizes on each nail, using a dotting tool to guarantee precise, clean circles every time. Try pairing a neutral base color with vibrant polka dots for a traditional look, or experiment with seasonal shades to match any occasion. The possibilities are endless when you combine classic polka dots with other nail art elements, like metallic stripes or simple flower designs.
For a fresh take on this timeless pattern, you'll love alternating between single-color dots and multicolored arrangements across different nails. Don't be afraid to play with spacing and placement – you can create everything from structured grid patterns to free-flowing, random dot placements that showcase your creativity.
Geometric Dot Pattern Layouts
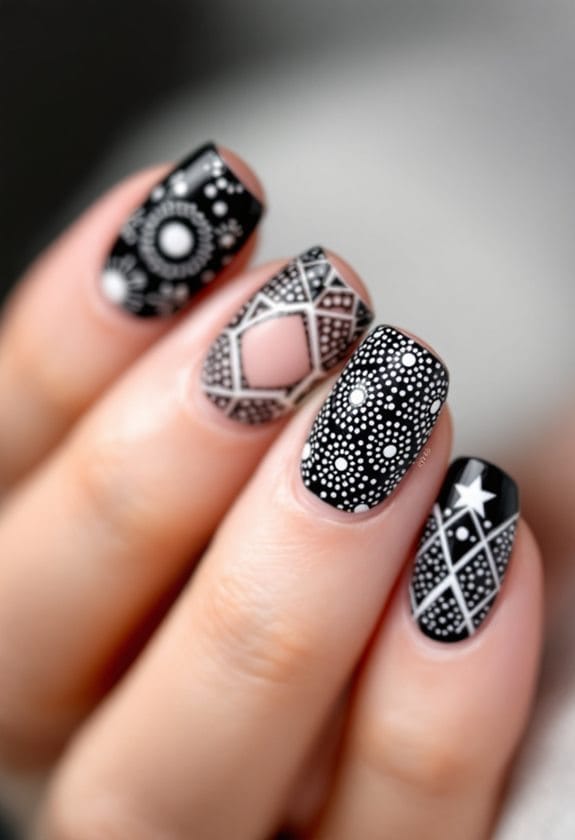
Moving beyond classic polka dots, geometric dot pattern layouts take nail art to new mathematical heights. You'll discover endless possibilities by arranging dots into triangles, squares, and hexagons that create eye-catching designs with modern flair.
Start with contrasting colors to make your geometric dot patterns really pop, like pairing crisp black dots against a white base or bold neons with neutral backgrounds. You'll want to use different-sized dotting tools to create varying dot dimensions, which adds depth and sophistication to your geometric layouts.
Don't be afraid to mix things up by combining your dot patterns with clean lines or stripes, creating a contemporary look that's both structured and stylish. You can take your design even further by experimenting with layered patterns, placing smaller dots within larger geometric shapes for a stunning multi-dimensional effect.
For the best results, keep your hand steady and work systematically across each nail, building your geometric patterns one dot at a time. You'll find that these mathematical-inspired designs aren't just beautiful – they're conversation starters that showcase your attention to detail and creative vision.
Recommended Products

All in One 3D Gel Kit:This builder nail gel star kit, everything you need to create pretty 3D nails at home: white, clear and pink 3D sculpting gel, hibiscus and ocean silicone molds, mini nail lamp, base coat, top coat, rhinestones and rhinestone glue. Use the blooming gel for soft, dreamy color effects, liner gels for fine details, and rhinestones for a sparkling, natural-looking

【12 Vibrant Highly Pigmented Colors】This nail art pens set features 12 rich, eye-catching shades—from bold reds, purples, and metallics to soft pastels—covering all style needs. The highly pigmented formula ensures vivid, long-lasting color that resists chipping, water, and heat, making your nail designs stand out for daily wear or special occasions.
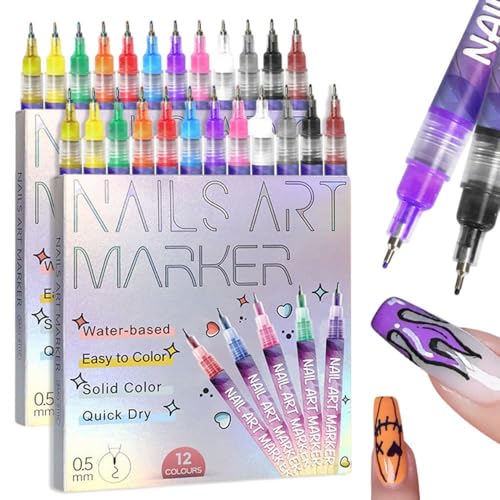
12 Vibrant, Saturated Colors: Create stunning nail art with a rich palette of shades, perfect for bold statements and delicate accents on both fingernails and toenails.
Floral Designs Using Dots
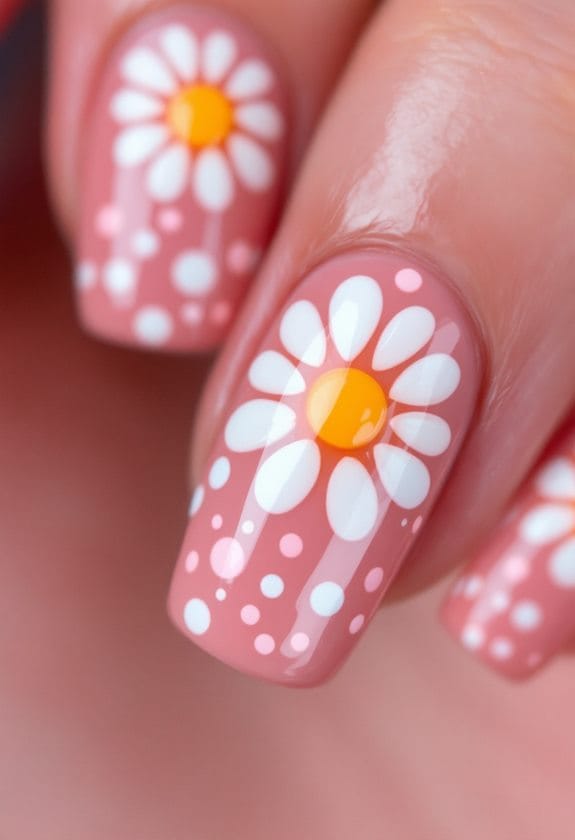
Transform your nail art by creating delicate floral designs with strategically placed dots. Using a dotting tool, you'll discover how simple it is to craft beautiful blooms that appear to dance across your nails, bringing a touch of nature to your fingertips.
Start by selecting contrasting colors that'll make your floral designs pop, like sunny yellow dots for flower centers against crisp white petals. You can create stunning daisies by arranging dots in a circular pattern, placing a larger dot in the middle and surrounding it with smaller dots for petals. For more intricate flowers, try working in a spiral pattern, gradually building up layers of dotted petals that mimic the natural growth of roses.
Don't be afraid to experiment with seasonal color combinations that'll make your floral designs using dots truly shine. Add small green dots between your flowers to represent leaves, or incorporate tiny white dots as highlighting details. You'll find that this versatile technique works beautifully for both simple springtime daisies and complex summer bouquets, making it perfect for year-round nail art expression.
Ombre Effect With Dots
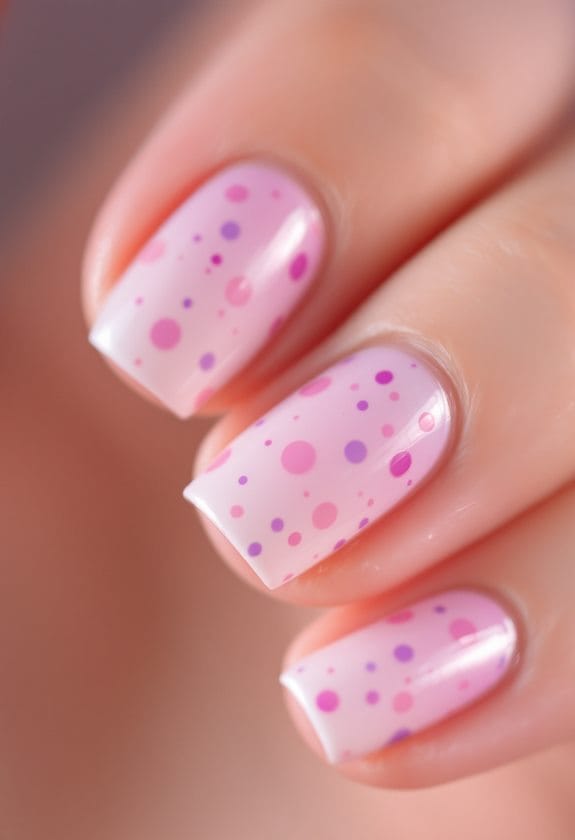
Your journey into creating stunning ombre dot patterns starts with mastering the spacing between dots, placing them closer together near the cuticle and gradually spreading them apart toward the tip. You'll want to select three or four shades within your chosen color family, starting with the darkest at the base and working up to the lightest shade at the tip. The dots' placement creates a beautiful gradient effect that's perfect for any occasion, and you can enhance the design by varying the dot sizes from larger at the base to smaller at the tip.
Dot Spacing Techniques
Creating an ombre effect with dots requires a strategic approach to dot spacing, shifting seamlessly from dense to sparse areas on the nail. You'll want to start at your chosen focal point, typically the cuticle or tip, where you'll place your dots closer together for maximum impact.
Using your dotting tool, begin with larger dots in your chosen shade, placing them close together in your starting area. As you move toward the blending zone, gradually reduce both the size of your dots and the spacing between them. You'll find that varying the dot sizes creates more depth and dimension in your design, making the ombre effect more natural and eye-catching.
For the best results, work in small sections and maintain consistent pressure with your dotting tool. You can create stunning gradients by shifting from light to dark shades or vice versa, always ensuring your base color is completely dry first. Remember to seal your masterpiece with a glossy top coat, which not only protects your design but also enhances the overall visual impact of your dot gradient pattern.
Color Gradient Patterns
Building on your dot spacing skills, color gradient patterns take dot nail art to stunning new levels. You'll create mesmerizing changes from light to dark shades that add depth and sophistication to your nail designs, making every manicure a masterpiece.
Start with a smooth base coat and your chosen color foundation, then prepare for the gradient magic. You'll want to use a makeup sponge to blend your chosen shades seamlessly, creating that perfect ombre effect before adding your dots. As you work with your dotting tools, place lighter dots near the base of your nail and gradually shift to darker shades toward the tip.
For added dimension, mix up your dot sizes throughout the gradient pattern. Try using larger dots for your main color changes and smaller ones to fill in gaps, creating a flowing, professional look. Don't forget to experiment with complementary colors that'll make your design pop. Once you're satisfied with your color gradient patterns, seal your artwork with a glossy top coat. You'll love how the finished design catches the light and showcases your precise dotting technique.
Creative Dot Accent Placements
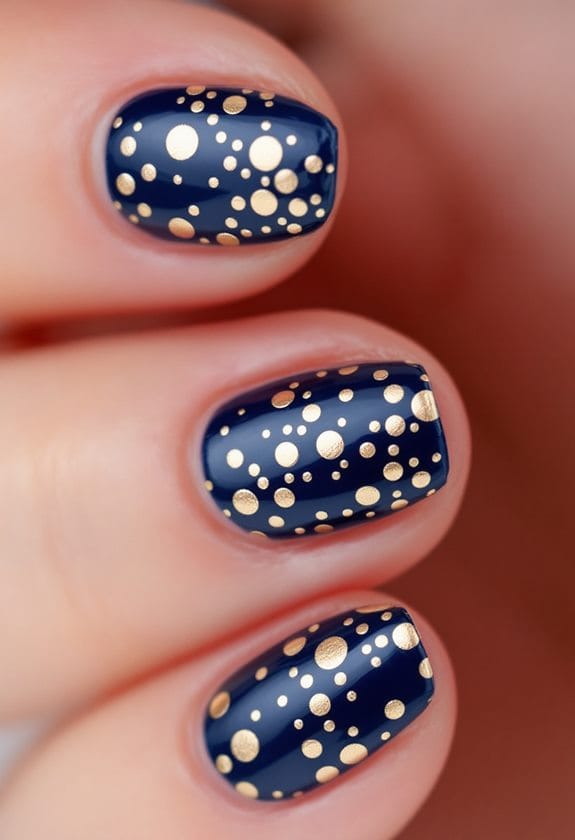
You'll love exploring creative dot placements that transform your nails into stunning works of art, from edge-to-center gradients to eye-catching diagonal patterns. Start by placing dots along your cuticle line, creating a sparkling border that frames your entire nail with perfectly spaced accents. Whether you're drawn to symmetrical designs or playful scattered patterns, these strategic dot placements let you build beautiful, professional-looking nail art that's sure to grab attention.
Edge-to-Center Dot Placement
When you're ready to take your dot nail art to the next level, edge-to-center placement offers a mesmerizing gradient effect that enhances your nail's natural shape. You'll love how this technique creates an eye-catching design that draws attention to your beautiful manicure.
To achieve this stunning look, start by selecting your favorite base color and letting it dry completely. Next, choose a contrasting shade that'll make your dots pop, whether you're working with playful pastels or bold neon colors. Using your dotting tool, begin placing larger dots around the edge of your nail, gradually decreasing the size as you work toward the center.
You can create endless variations by experimenting with different color combinations and dot sizes. Try using multiple dotting tools to achieve a more dynamic gradient effect that'll make your nails truly stand out. The key to perfect execution is patience – make sure each layer is completely dry before adding your dots. This technique works beautifully for special occasions or everyday wear, and you'll find it's versatile enough to match any outfit or style preference.
Diagonal Dot Patterns
Diagonal dot patterns offer a striking way to create movement and visual interest across your nails. You'll love how these dynamic designs flow naturally from one corner to another, creating an elegant and eye-catching effect that's perfect for any occasion. By placing dots along angled lines, you're adding a sophisticated touch that makes your nail art stand out from traditional straight-line patterns.
You can enhance your diagonal dot patterns by playing with different dot sizes, creating depth and dimension that catches the light beautifully. Try using larger dots at one end of the diagonal line and gradually decrease their size, creating a stunning gradient effect that draws the eye. When selecting colors, you'll find that contrasting shades make your dots pop, while complementary hues create a more subtle, refined look.
To achieve professional-looking results, you'll want to space your dots evenly using a dotting tool for precise placement. Don't be afraid to experiment with seasonal variations – try ice-blue dots for winter designs or bright coral patterns for summer looks. You can also combine multiple diagonal lines with varying dot sizes to create intricate, mesmerizing patterns that truly showcase your creativity.
Cuticle-Line Dot Designs
Along the cuticle line, elegant dot designs create a stunning frame for your nail art that draws attention to the natural curve of your nails. You'll love how these delicate accents transform your manicure into a sophisticated masterpiece, perfect for any occasion.
Creating cuticle-line dot designs is all about precision and creativity. You can use different-sized dotting tools to craft varied patterns, from tiny pearls to larger statement dots that make your nails pop. Whether you're matching your base color or creating an eye-catching gradient effect, the possibilities are endless.
To get started, you'll want to apply your base color first and let it dry completely. Then, using your chosen dotting tool, carefully place dots along the cuticle line, maintaining even spacing for a professional finish. You can create single rows for subtle elegance or multiple rows for dramatic impact.
Don't forget to seal your artwork with a quality top coat – it's the key to making your cuticle-line dots shine and last longer. This versatile technique works beautifully for both everyday wear and special events, making it a must-try design in your nail art repertoire.
Frequently Asked Questions
How to Do Nail Art Dots?
You'll need a dotting tool to master dot techniques. Dip it in polish, gently press on your nail with varying pressure for different sizes, and layer colors after each section dries completely.
What Can I Use Instead of a Nail Dotting Tool?
You can use common household items like toothpicks, bobby pins, pencil erasers, sewing needles, cotton swabs, or straw tips instead of a dotting tool. They'll work just as well for creating nail dots.
How to Do Beautiful Nail Art?
Start with eye-catching color combinations you love, then keep your designs clean and precise. You'll want to practice basic techniques first, building up to more complex patterns as your skills improve.
How Do You Make Circles in Nail Art?
Practice makes perfect! You'll create flawless circles by dipping a dotting tool in polish, pressing gently on your nail, and lifting straight up. Start with larger dots, then work your way to smaller ones.