As an Amazon Associate, we earn from qualifying purchases. Some links on this site are affiliate links at no extra cost to you. Our recommendations are based on thorough research and editorial judgment.

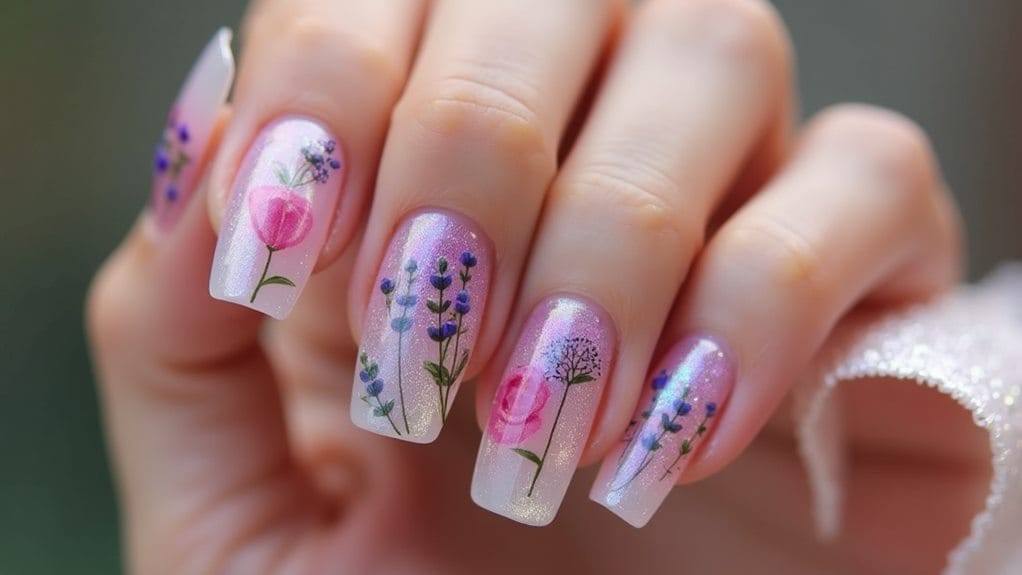
7 Must-Know Secrets For Dried Flower Nails

Creating stunning dried flower nails requires seven essential secrets for success. You'll need to start with perfectly prepped nails, including thorough cleaning and a solid base coat. Choose your dried flowers strategically, matching sizes to your nail beds and mixing shapes for visual interest. Master the glue technique by applying precise dots and working quickly while the adhesive is tacky. Position flowers carefully using proper tools like tweezers, and seal them gently with a quality top coat. Protect your design with regular maintenance and proper storage away from sunlight. These foundational tips will help you reveal even more beautiful dried flower nail possibilities.
Key Takeaways
- Clean and prepare nails thoroughly, applying a base coat and nude polish before using glitter polish as adhesive for flowers.
- Select dried flowers that match your nail size, mixing different shapes for visual interest and depth.
- Apply precise dots of glue beneath flower edges and wait for tackiness before securing petals with gentle pressure.
- Position flowers strategically using tweezers, avoiding overcrowding while ensuring proper placement on each nail.
- Seal the design with a quality top coat using dabbing motions, and protect from water damage by wearing gloves.
Perfect Base Preparation Matters
Beyond any other element of dried flower nail art, creating the perfect base is essential for a long-lasting, professional-looking design. You'll want to start with thoroughly clean nails that have been properly filed, creating a smooth canvas that's ready for your stunning floral masterpiece.
Begin by applying your trusted base coat, making sure to cover the entire nail surface evenly and precisely. Once that's set, you'll need to create your neutral foundation with two thin layers of flesh-tone or nude polish, allowing each coat to dry completely before moving forward. This step is vital for achieving that perfect, natural-looking backdrop for your dried flowers.
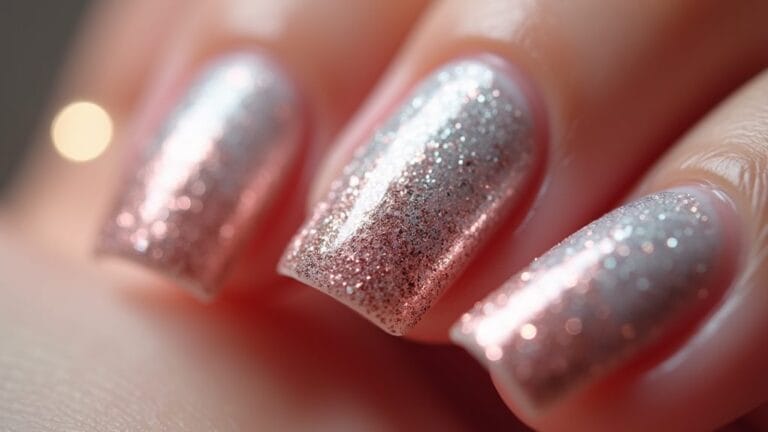
Here's where the magic happens – while your final layer of chunky glitter polish is still wet, you'll have the perfect adhesive surface for placing your delicate dried flowers. The glitter not only adds beautiful dimension to your design but also creates tiny anchors that help secure your flowers in place. Remember, timing is everything when you're working with the glitter layer, so keep it fresh and tacky while positioning your botanical elements.
Choose Your Flowers Strategically
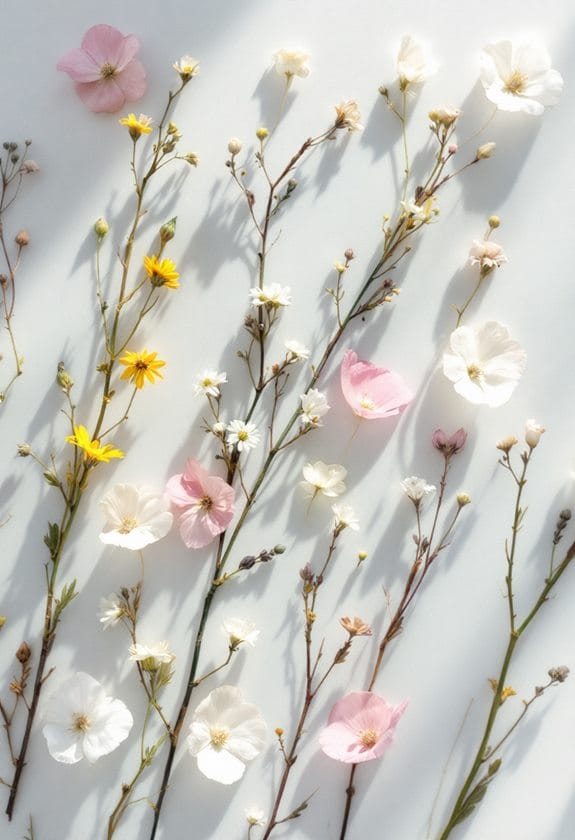
When you're planning your dried flower nail design, matching the right flower size to your nail bed is essential for a stunning, well-balanced look. Your flower choice will shape the entire design, with petite blooms working beautifully on smaller nails and fuller flowers creating dramatic impact on larger nail beds. The natural curves and shapes of your chosen flowers will determine how they lay on your nails, so select varieties that complement your desired style and nail shape.
Recommended Products

Dry Flower Bouquet Framed Canvas Wall Art Picture Print Home Decor. Quality You'll Love With Archival Grade Materials & Vivid Colours . This Beautiful Canvas Wall Art Will Brighten Up the decor in your Home, Office, Living Room, Bedroom, Nursery & even Bathrooms!
Quality You'll Love With Archival Grade Materials & Vivid Colours . This Beautiful Canvas Wall Art Will Brighten Up the decor in your Home, Office, Living Room, Bedroom, Nursery & even Bathrooms!

Framed & Ready to Hang - Hand made for you and framed on warp free 18mm Kiln dried solid pine frames.
Size Affects Nail Coverage
Like a painter choosing the right brushes, selecting appropriately sized dried flowers for your nail art can make or break your design. You'll want to match the flower size to your nail dimensions, creating a perfect balance that enhances your overall look.
When working with smaller nails, opt for tiny dried flowers that won't overwhelm the surface, allowing you to create delicate, detailed designs that complement your natural nail shape. For larger nails, you've got more creative freedom – try layering multiple small blooms to achieve stunning depth, or showcase a single larger flower for dramatic impact.
Flower Shape Matters Most
The strategic selection of flower shapes takes your nail art to the next level, building on the importance of size considerations. When it comes to creating stunning dried flower nail designs, flower shape matters most for achieving that perfect, professional finish.
You'll want to prioritize smaller, delicate flower shapes for intricate designs that won't overwhelm your nails. These petite blooms create beautiful detail while maintaining a balanced, sophisticated look. For a bolder statement, you can incorporate larger flowers strategically, placing them as striking focal points that draw attention to specific nails.
Look for flowers with naturally flat petals, as they'll sit smoothly against your nail surface and won't catch on hair or clothing. You'll find that mixing different flower shapes creates amazing depth and visual interest, especially when you pair tiny buds with medium-sized blooms. Consider how each flower's shape contrasts with your base polish color – this thoughtful combination can transform a simple design into a head-turning masterpiece. By selecting shapes that complement each other and your nail size, you'll create harmonious designs that look both elegant and effortlessly stylish.
Master The Glue Technique
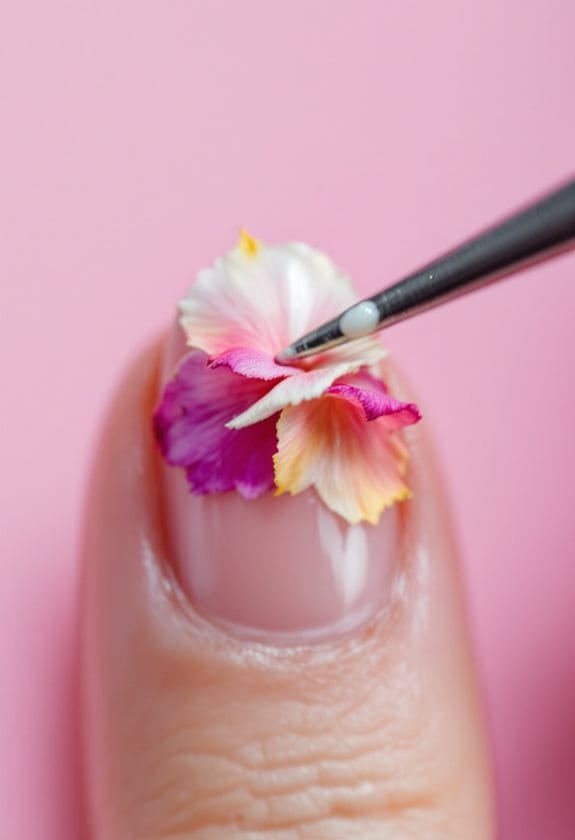
Getting your glue technique right starts with perfect control, where you'll want to apply tiny, precise dots exactly where each flower will sit. You'll achieve the best results by placing these dots strategically at the flower's center point and any extending petals that need extra security. Once you've mastered your timing, you'll notice the glue sets quickly, so work efficiently and press each flower down immediately after placement for that stunning, professional finish.
Recommended Products

Designed to go over popcorn ceilings and most other surfaces without the need for expensive tools.

Not for drop ceilings, not for commercial use. Very light weight, only 1 oz per tile. Instantly transforms most ceiling surfaces including popcorn ceilings

INFORMATION 1.76oz 2 parts 5 minutes setting epoxy glue (with pusher and stirrer), non-toxic and non-irritating smell, fixed pusher setting ratio (1:1), can be used to repair all kinds of metal, plastic, rubber, wood and other objects.
Perfect Adhesive Amount Control
Mastering glue application stands as the most essential skill for creating flawless dried flower nail art. You'll discover that controlling your nail glue amount makes the difference between a professional-looking design and a messy result that disappoints.
Start by practicing with a toothpick, which lets you apply the perfect tiny dab of nail glue to each dried flower's back. You'll love how this technique gives you incredible control, preventing those frustrating glue overflows that can ruin your design. When you're ready for real application, try placing the glue directly on your nail instead of the flower – it's a game-changer for achieving that clean, polished look.
Before diving into your actual manicure, test your technique on a spare nail or paper to get comfortable with different flower sizes. Remember to wait for the glue to become slightly tacky before placing your flowers, as this creates the strongest bond. You'll know you've got it right when you see no excess glue peeking out from under those delicate petals, creating a stunning, professional finish that looks absolutely seamless.
Strategic Glue Placement Spots
Strategic placement of nail glue transforms your dried flower nail art from basic to breathtaking. When you're working with delicate dried flowers, knowing exactly where to place your adhesive makes all the difference between a lasting masterpiece and a disappointing design.
Start by applying a tiny amount of glue to the base of your dried flowers, keeping the application precise and controlled to prevent any messy overflow. You'll want to focus on securing the edges of each petal, which creates that stunning 3D effect everyone loves while maintaining the flower's natural, lifted appearance. For those gorgeous larger blooms, don't hesitate to add small dots of glue at multiple points along the petals, ensuring they stay perfectly in place throughout your daily activities.
Here's a pro tip that'll change your nail art game: grab a toothpick for those intricate details. It's perfect for precisely placing glue on tiny flower parts without creating any mess. Remember to work quickly while your nail polish is still wet, as this creates the strongest bond between your dried flowers and the nail surface.
Quick-Set Timing Tips
While precise glue placement sets the foundation for your dried flower nail art, timing is the secret weapon that guarantees your design stays flawless. You'll want to work quickly and efficiently, as nail polish and glue can set faster than you might expect.
Start by applying your base nail polish and work on one nail at a time to confirm perfect flower placement. When you're ready to attach the flowers, apply a small dab of glue and immediately position your dried flower using tweezers. Don't wait more than a few seconds between applying the glue and placing the flower, as quick action leads to better adhesion.
For stunning results, you'll need to master the art of sectioning your work. Allow each decorated nail to partially dry before moving on to the next one, preventing accidental smudges or displaced flowers. Once you've positioned your flower, immediately use a toothpick to press down the petals gently but firmly. This vital step confirms every delicate petal bonds securely with your nail polish base, creating a perfect, long-lasting design that's sure to turn heads.
Optimal Flower Placement Tips

The art of placing dried flowers on nails requires careful attention to detail and the right techniques for a flawless finish. When you're working with real flowers, understanding ideal flower placement tips can make the difference between beautiful and breathtaking results.
Start by choosing the right flower size for your nail beds – smaller nails look best with a single delicate bloom, while larger nails can handle multiple overlapping flowers. You'll want to use your tweezers with precision, gripping each flower carefully to maintain control during placement. For an easier transfer, try the upside-down method: place your flower face-down and press your wet nail onto it.
Once you've positioned your flowers, you're not stuck with their initial placement. While your glitter coat is still wet, use a toothpick to adjust the petals until they're exactly where you want them. Don't forget to press down any stubborn petals that might be lifting – this guarantees they'll stay perfectly flat under your top coat. These small adjustments make a huge difference in achieving that professional, salon-worthy finish you're aiming for.
Recommended Products

Cut precise, measured strips of pasta dough, pie dough, croissants, fondant and more

Ateco #5870 Letter Plunger Cutter set makes quick and easy work of creating decorations to personalize cakes, pies, cookies, and other treats

Ateco #612 round revolving cake decorating turntable is ideal for easier and more professional decorating results; this cake stand is preferred by professional pastry chef's due to the weight and long lasting durability
Seal Without Damaging Petals
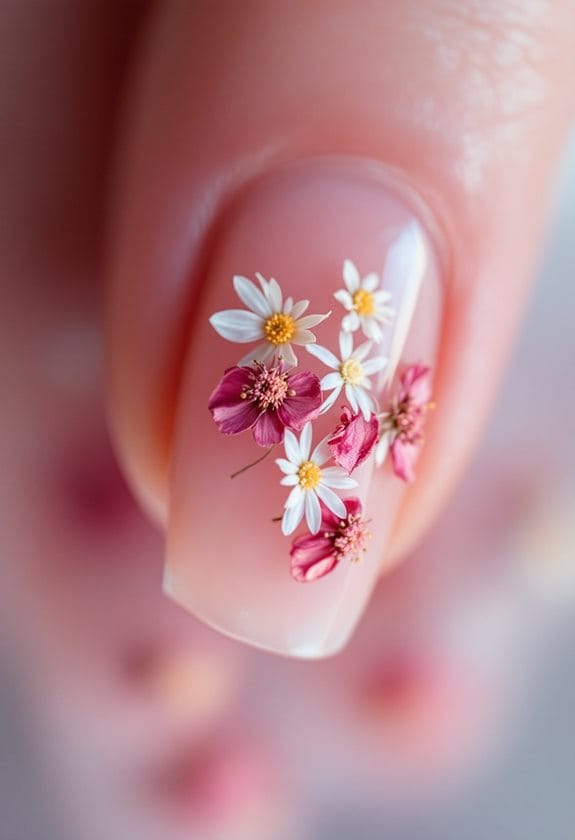
Sealing dried flowers on your nails represents one of the most essential steps in achieving long-lasting nail art. Your delicate floral masterpiece needs proper protection, and that's where a high-quality top coat comes into play.
To protect your beautiful dried flowers, you'll want to reach for a heavy-duty top coat like Seche Vite Dry Fast, which creates a stunning, glossy shield over your design. When applying the top coat, you'll need to use a gentle touch to avoid disturbing those precious petals. Try using a dabbing motion with a sponge applicator instead of traditional brush strokes, which helps distribute the product evenly without causing damage.
Before you start sealing, double-check that your flowers are firmly secured with nail glue – this prevents any lifting or shifting during the top coat application. Once you've carefully applied your top coat, give it plenty of time to dry completely. Don't rush this final step, as proper curing time guarantees your flowers stay perfectly preserved beneath that crystal-clear finish, giving you a professional-looking manicure that'll last for days.
Recommended Products

【48 Colors Gel Nail Polish Kit】 Beetles gel nail polish set includes 48 carefully selected 5 ml gel colors, plus 1 base coat, 1 glossy top coat, 1 matte top coat, and 1 nail magnet. With a wide range of popular shades, this kit gives you more options for creating everyday manicures, bold color looks, layered designs, and magnetic nail art effects.

Drip & Clog Proof Design: Ensures smooth and mess-free application for precise nail bonding.

【92Pcs Complete Manicure Kit】 AzureBeauty dip powder kit includes 24*0.16 oz dip powder colors (contains special dried flower color), 4*0.33 oz dip powder liquid set(base coat/activator/topcoat/brush saver), 1*Portable Electric Nail Drill, 11* drill bits, 10 *table mat, 1*Ceramic Corn Head, 1*type-c charging cable, 30*sanding band, 1*cuticle oil pen, 3*nail sticks, 1*nail file, 1*dust brush, 1*recycling tray, 2*liquid replacement brush, 1*storage bag; and user manual quick start guide
Extend Your Design's Lifespan
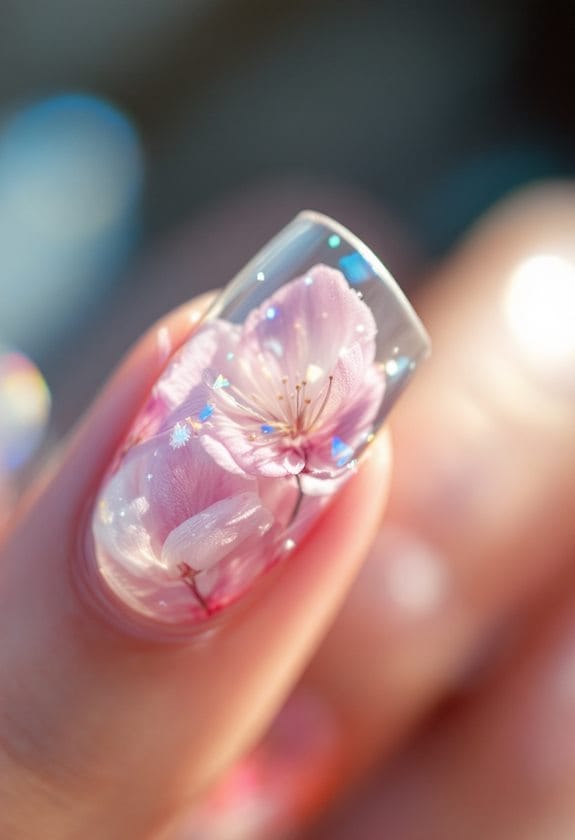
Maintaining beautiful dried flower nail art requires consistent care and attention to detail. You'll need to protect your delicate designs with a heavy-duty top coat like Seche Vite, which creates a durable shield against everyday wear and tear.
To keep your dried flower nails looking fresh and vibrant, you'll want to follow some simple but effective care tips. First, avoid soaking your hands in water for too long, as this can compromise the adhesive and cause your flowers to lift. Instead, wear gloves when doing dishes or cleaning to protect your stunning nail art.
Keep your nails looking their best by storing them away from direct sunlight, which can fade those beautiful petals and diminish their natural colors. Don't forget to check your nails weekly for any signs of wear, and apply a fresh layer of clear polish or top coat to maintain that gorgeous shine. When you're first creating your design, make sure to press down any loose petals with a toothpick before your polish sets – this simple step will help your dried flower nails stay intact longer and prevent annoying lifting or peeling.
Essential Tools For Success
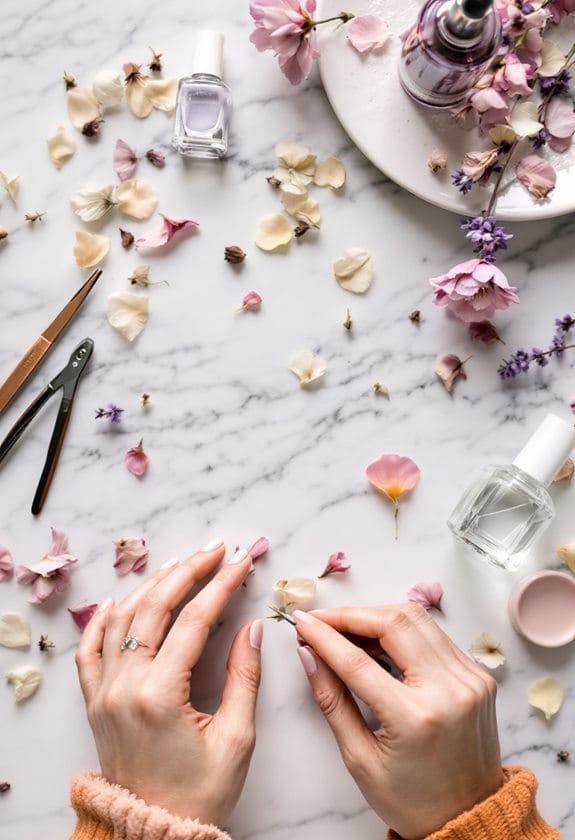
With proper tools at your disposal, creating stunning dried flower nail art becomes a breeze. Your journey to beautiful neutral nail art starts with selecting high-quality dried flowers, which you can find in convenient 12-variety packs offering endless creative possibilities. These delicate blooms will transform your manicure into a wearable garden that's sure to catch everyone's eye.
Your toolkit wouldn't be complete without precision instruments like nail art tweezers and a trusty toothpick, which you'll use to position those tiny petals with expert precision. For your base color, you'll want to start with a flattering flesh-tone polish like Sally Hansen's "Nude Now," creating the perfect canvas for your floral masterpiece. To add some sparkle and dimension, incorporate a stunning copper glitter polish that'll make your flowers truly pop.
Don't forget the most essential finishing touch – a heavy-duty top coat like Seche Vite Dry Fast. This professional-grade sealer will lock your delicate dried flowers in place while adding a gorgeous shine that makes your neutral nail art look fresh from the salon.
Recommended Products

Artwork Design:This Boho Floral Wall Art features delicate pampas grass and dried floral arrangements in calming beige tones. The soft neutral palette adds a touch of warmth and tranquility, making it a perfect addition to modern, minimalist, or farmhouse home decor

Mother’s Day Gift Box — Elegant, Limited & Ready to Gift: Crafted as a refined keepsake gift box, this Mother’s Day edition includes a carnation brooch, dried flower bouquet, vintage photo frame and heartfelt greeting card—beautifully arranged to express love and gratitude. No extra wrapping needed, ready to impress the moment she opens it.

Rechargeable Wireless Nail Lamp: Makartt 54W UV LED Nail Lamp builded in a 2600mAh big capacity battery. This gel nail light is a great choice for a manicure when there is no power outlet. Fully charging time: 2.5H. Working time: 3H. Convience to use for professional nail art salon.
Frequently Asked Questions
How to Use Dried Flowers on Nails?
Like delicate butterfly wings, dried flowers transform your nails beautifully. Apply nude polish, position flowers with tweezers while polish is tacky, press them flat, and seal with top coat for lasting application techniques.
How Do You Keep Dried Flowers From Falling Apart?
You'll need a strong top coat like Seche Vite to seal your dried flowers. Apply dried flower adhesives and clear polish layers carefully, avoid water exposure, and keep your nails protected from moisture and sunlight.
What to Spray on Dried Flowers to Preserve Them?
You'll get the best preservation techniques by using clear acrylic spray or floral preservative spray. If you're in a pinch, hairspray can work too, but you'll need to reapply it more frequently for lasting protection.
How to Keep Color in Dried Flowers?
You'll prevent color extraction by drying flowers in a dark, cool space. Use silica gel for quick moisture removal, spray with acrylic sealer, and store them away from sunlight in airtight containers.