As an Amazon Associate, we earn from qualifying purchases. Some links on this site are affiliate links at no extra cost to you. Our recommendations are based on thorough research and editorial judgment.

7 Simple Halloween Nails You Can Actually Do

Transform your nails into spooky masterpieces with seven beginner-friendly Halloween designs you'll love. Try minimalist ghost French tips for an elegant twist, easy blood drips for dramatic flair, or adorable black cat accent nails that'll make everyone smile. Create a festive orange ombre that's perfect for fall, or paint classic spider webs for that iconic Halloween look. You can also craft charming two-tone pumpkin nails or wrap up your style with simple mummy designs. Each look requires basic tools and techniques you already have, making these designs both achievable and fun. Let's explore each spine-tingling style in detail.
Key Takeaways
- Minimalist ghost French tips combine classic manicure with simple white ghosts and black dots for an easy Halloween look.
- Blood drip designs require only red polish and a thin brush to create dramatic effects from nail tips.
- Orange ombre manicures use a makeup sponge technique to blend two shades, offering a festive look with minimal skill.
- Quick mummy wraps need just black base coat and white crisscross patterns for a beginner-friendly Halloween design.
- Simple spider web art uses a thin brush or toothpick to draw white webs on black polish.
Minimalist Ghost French Tips
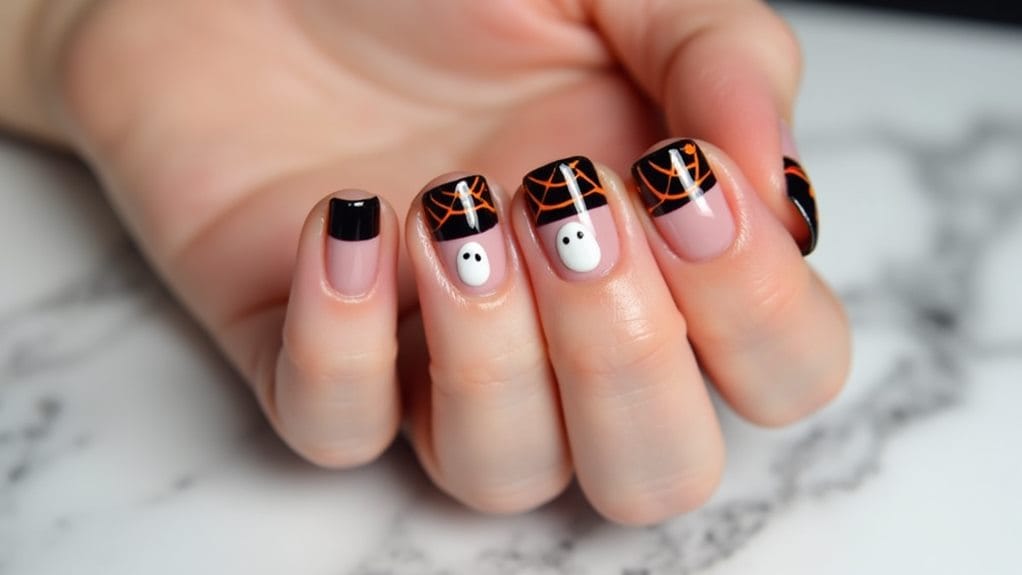
Looking for a sophisticated twist on Halloween nail art? Minimalist ghost French tips offer the perfect blend of classic elegance and seasonal fun, making them ideal for both office meetings and Halloween parties.
Start with a classic French manicure base using your favorite nude or light pink polish, creating that timeless clean look you love. Then, it's time to add the star of the show – adorable ghost designs along the white tips using either white polish or nail decals. You'll find these ghostly additions are surprisingly easy to replicate, especially if you're using silicone stamps or a fine detailing brush for precise application. Add tiny black dots for the ghosts' eyes to bring your festive manicure to life with a playful touch that isn't overwhelming.
Don't forget to seal your subtle Halloween look with a quality top coat, which will protect your design and add that professional shine. This versatile style works beautifully for those who want to embrace the spooky season while maintaining a polished appearance, proving that Halloween nail art doesn't have to be over-the-top to make a statement.
Recommended Products
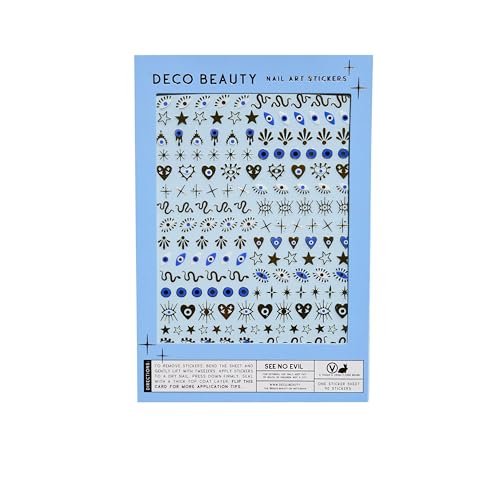
Easy to Use & Fun to Wear: These cute nail stickers make DIY manicures a breeze. The lightweight, durable decals go on smooth—no bubbles, no stress. Just pick, stick, and seal for a flawless finish. Ready for a new vibe? They’re just as easy to remove, so you can switch up your look anytime.
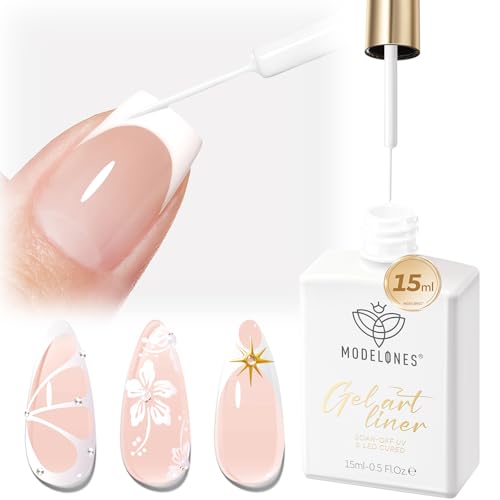
Ultra-Fine Precision Brush: Designed with a 0.2mm ultra-fine liner brush, Modelones white liner gel polish creates perfect French tips cleanly and quickly—no messy French stamp tools, no stained fingers, no palettes or extra brushes. It makes it effortless to draw clean lines and intricate nail art

Nail Art Stickers: You will get 30 Sheets french tip nail decals, includes 3 popular arc and moon shapes, and a free precision tweezer, providing everything you need for multiple, creative manicures. Suitable for different nail sizes and radian.
Easy Blood Drip Design
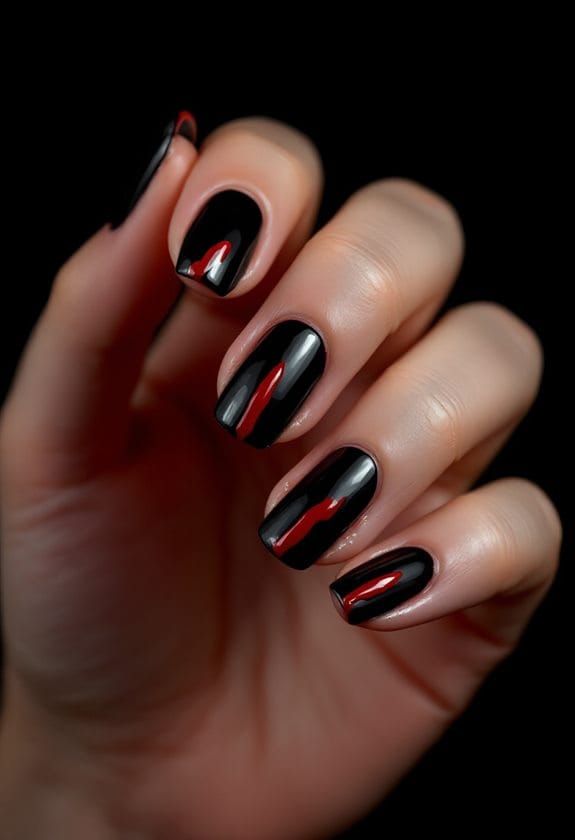
Getting started with a stunning blood drip design requires just a few essential tools: a base polish, deep red polish, and both glossy and matte top coats. You'll love how quickly this spooky look comes together as you paint your base color and carefully create drips at your nail tips using a thin brush for perfect control. The secret to professional-looking results lies in your drip technique: start with small drops at the tip, letting them naturally flow downward, and experiment with different lengths until you find your perfect haunted style.
Recommended Products

Quantity : 360 PCS l Color: Clear l Size: 2ML

100% Kolinsky Sable Hair: Yasterd nail brush is made of high quality Kolinsky sable hair to ensure durability that soft enough to sculpt and shape to any nail shape and size. It's a perfect choice even for professional manicurists. Nail your style, stylish and charming!

💗【Professional Nail Liner Brushes】: This art nail brushes comes with 5 pcs liner brushes in double-ended: 5/7/9/10/11/15/20/22/25/30mm. 4 Pcs dual-ended for 2/3/4/5 mm dotting pen with 3d, flat, round, ombre shape brush. Meets various of different nail art needs. Perfect for tiny details, delicate and exquisite patterns, fine lines of nail designs.
Essential Tools Needed
Creating a spooky blood drip nail design requires several essential tools that you'll need to gather before starting. First, you'll want a quality base coat to protect your nails and help your design last longer, followed by a stunning deep red polish for those perfect drips.
For precise application, you'll need either a nail art brush or small detail brush, which will give you complete control over your blood drip shapes. Keep some nail tape handy to create crisp, clean lines and protect your skin from any stray polish. If you're using gel polish, don't forget your UV lamp for proper curing between layers.
Your cleanup kit should include cotton pads and acetone to fix any mistakes and perfect those drip edges. A quick-dry top coat is absolutely essential for sealing your design and preventing smudges. For added dimension, grab a makeup sponge to create gorgeous gradient effects that'll make your blood drips look even more realistic.
Remember to have all these tools within easy reach before you start – there's nothing worse than hunting for supplies with wet nails!
Quick Application Steps
Transform your nails into a haunting Halloween masterpiece with this simple blood drip design. These easy Halloween nail effects are perfect for anyone who wants to create a spooky look without complicated techniques or professional tools.
Start by applying a clean base coat in a neutral or light shade, which will make your blood drip design really pop. Once that's dry, you'll use your red polish to create dramatic drips from the tips of your nails, working carefully with a thin brush for precise control. For an extra touch of horror, mix in a darker red shade to create stunning gradient blood drips that look amazingly realistic.
The secret to making your spooky design last through any Halloween event is in the finishing touches. Apply a glossy top coat over your nail color and blood effects, which not only seals your artwork but also adds a wet-look dimension that makes the drips appear fresh and lifelike. Let each layer dry completely between application steps to prevent smudging, and you'll have perfectly haunting nails that are sure to turn heads at your next costume party.
Perfect Your Drips Technique
Your perfect blood drip design hinges on mastering a few key techniques that make the difference between amateur and professional-looking results. Start with a well-applied base color, letting it dry completely to prevent smudging when you add your drips.
Using a small nail art brush, create teardrop shapes that flow naturally from your cuticle toward the nail tip. You'll want to practice this technique on paper first, focusing on making each drip look smooth and natural with varying lengths and widths. Don't worry if they're not identical – that's part of the authentic Halloween nails appeal!
To add depth to your blood drip design, layer different shades of red, making the drips appear more realistic and dimensional. You can even add a tiny touch of black at the tips for extra drama. Once you're happy with your design, seal everything with a clear top coat, which will smooth out any texture and add a gorgeous shine. This final step isn't just for looks – it'll help your spooky masterpiece last through all your Halloween festivities!
Black Cat Accent Nails
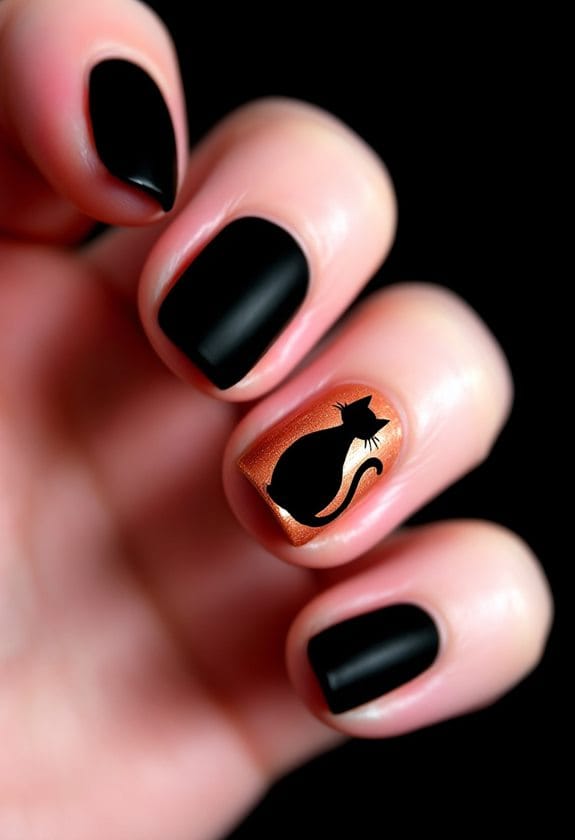
Start your black cat design with a sleek, glossy black base coat that's perfectly smooth and ready for your feline masterpiece. Using a fine nail art brush or nail decals, create detailed cat features like glowing eyes, pointed ears, and delicate whiskers on one or two accent nails for that perfect Halloween touch. Add some sparkly charm to your design with metallic accents or glitter top coat around your black cat, making the whole look pop with Halloween magic.
Recommended Products

10 Nails/One Set in 3 Sizes (This L 17mm 13mm 14mm 12mm 10mm) the arc length of the nail (from side to side) - Various nail sizes ensure a totally custom fit, Each set comes complete with a storage box, Strong Adhesion Jelly Glue , double-sided nail file, cuticle stick, and Wet Wipe Pads.

ALL-IN-ONE Gel Manicure Kit with UV light : LAVENDER VIOLETS nail kit for beginners with everything includes what you need for stunning nails at home. This gel nail kit features 45 vibrant gel polish colors, a base coat, glossy top coat, matte top coat, and nail primer. You’ll also find essential tools like a cuticle oil pen, cuticle pusher, trimmer, tweezer, nail buffer, nail file, LED nail lamp, nail decal stickers, remover foil wraps, and rhinestones. This comprehensive gel manicure kit with U V light is perfect for any nail enthusiast.

ALL-IN-ONE Gel Manicure Kit with UV light : LAVENDER VIOLETS nail kit for beginners with everything includes what you need for stunning nails at home. This gel nail kit features 45 vibrant gel polish colors, a base coat, glossy top coat, matte top coat, and nail primer. You’ll also find essential tools like a cuticle oil pen, cuticle pusher, trimmer, tweezer, nail buffer, nail file, LED nail lamp, nail decal stickers, remover foil wraps, and rhinestones. This comprehensive gel manicure kit with U V light is perfect for any nail enthusiast.
Sleek Black Base Prep
Before diving into the spooky cat designs, creating a flawless black base is crucial for your Halloween nail art. You'll want to start with a quality base coat, which not only protects your natural nails from staining but also creates the perfect canvas for your stunning Halloween nails.
Once your base coat is dry, it's time to apply your black nail polish. Choose a high-quality formula that delivers a sleek finish, and apply two thin coats rather than one thick layer. This technique guarantees even coverage and that perfect glossy look you're aiming for. Remember to let each coat dry completely before moving on to the next step.
After your black base is set, you'll be ready to create those cute cat faces on your accent nails. Before starting the detailed work, make sure your black polish is completely dry to prevent smudging. Finally, seal your masterpiece with a generous layer of top coat, which will protect your design and add extra shine. Don't rush the drying time – give your nails plenty of time to set for a truly professional finish.
Detailed Feline Features
Creating enchanting black cat faces requires precision and the right tools for those perfect feline features. Once you've laid down your sleek black base, you'll bring your Halloween nails to life with carefully placed details that make all the difference.
Start by using your nail art brush to paint striking yellow or green eyes that pop against the dark background. You'll want to make them slightly almond-shaped for that authentic feline look. Next, add small white dots for whiskers and a tiny pink nose, keeping the design balanced and symmetrical. The magic happens when you create depth by applying a matte top coat to the black base while leaving the cat features glossy and vibrant.
For an extra touch of sophistication, consider adding tiny gold studs as a collar detail around your black cat's neck. This subtle embellishment transforms your Halloween nails from cute to elegantly spooky. Remember to seal everything with a clear top coat to guarantee your feline features stay purr-fect throughout your Halloween festivities. The contrast between the matte and glossy finishes will make your design truly stand out.
Sparkly Halloween Touches
While detailed cat faces make stunning centerpieces, accent nails let you play with sparkle and shine to amplify your Halloween manicure's impact. You'll find that black cat designs become even more enchanting when you pair them with sparkly topcoats and shimmering effects that catch the light.
Start with a solid base color on your accent nail, then use nail art decals or a fine brush to create simple designs of your feline friend. You'll get clean lines by applying nail tape as a guide, ensuring your black cat silhouette looks sharp and professional. Add rhinestones around the design to create a festive border that draws attention to your spooky masterpiece.
Don't forget to coordinate your remaining nails with complementary Halloween colors like deep purple, orange, or metallic gold. These shades work perfectly alongside your black cat accent, creating a balanced and cohesive nail design. For extra drama, layer different sparkly topcoats over your base colors, letting each nail tell its own part of your Halloween story while maintaining a unified theme that's both sophisticated and fun.
Simple Orange Ombre Manicure
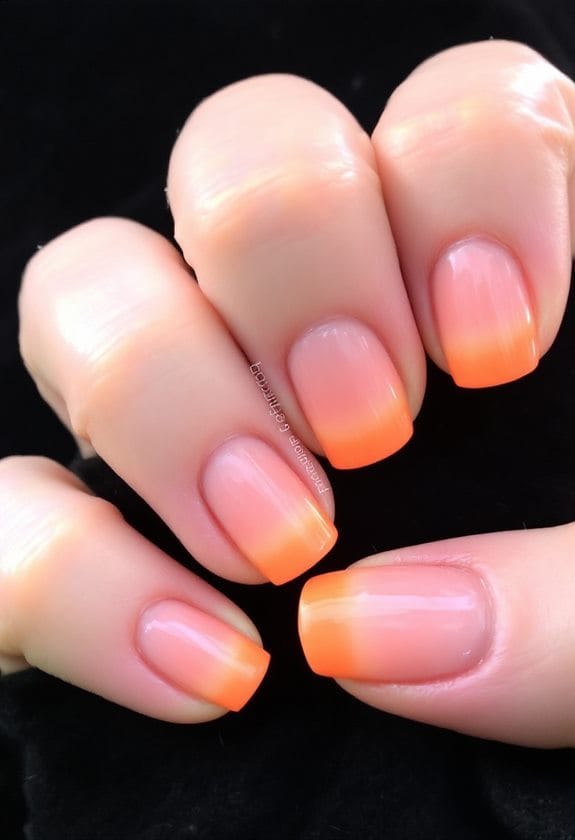
A stunning orange ombre manicure brings the perfect Halloween vibe to your nails without complex designs. You'll start by applying a protective base coat, followed by a light peach or nude polish that creates an ideal foundation for your gradient effect.
Here's where the magic happens: grab a makeup sponge and apply two shades of orange polish, creating a beautiful shift from light to dark. You'll want to dab the polish onto the sponge and gently press it onto your nails to blend colors seamlessly. The key is patience – allow each layer to dry for 10-15 minutes to prevent any unwanted smudging.
Once you've achieved your desired ombre effect, seal your masterpiece with a clear top coat for extra shine and durability. For a festive touch, consider adding a sprinkle of glitter top coat. Want to make it even more Halloween-themed? Add some playful nail decals featuring Halloween icons like tiny pumpkins or bats to your accent nails. This simple orange ombre manicure is perfectly spooky yet sophisticated, making it ideal for any Halloween celebration or autumn gathering.
Recommended Products

Beetles Stpatrick Nail Art Gel Set: Perfect Choice Collection Gel Kit contains 5ml*50 different colors: Red, Orange, Yellow, Green, Blue, Purple, Pink, Black, White, Brown, Silver, Gold...incredible amounts of colors! Perfect for those trendy squiggly lines abstract painting that is so popular now.
【63 PCS 55 Colors Gel Polish Kit】Beetles gel nail polish set includes 55 color gel polish shades, base coat, glossy top coat, matte top coat, nail art stickers, and a nail brush. A complete gel polish kit for creating colorful manicures, accent nails, French tips, gradient nails, and DIY nail art at home.

Personal Style: Beetles 2021 spring summer nail color trend.Neon means bright and bold. Applying neon gel polish to live your life out loud. The picture is a matte applying effect and you need to use it with the Matte Top Coat. This product does not include Matte Top Coat.
Basic Spider Web Art
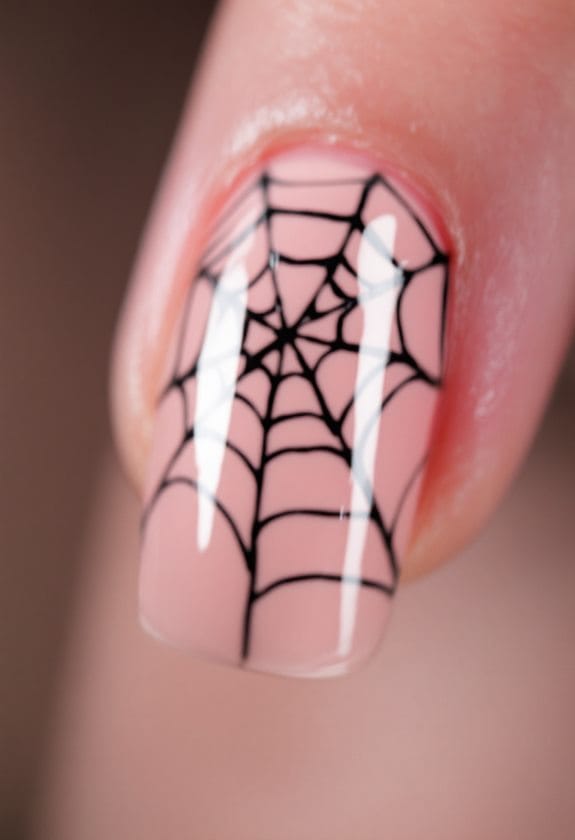
Spider web nail art ranks among the most iconic Halloween designs you can create at home. With just a few basic supplies and steady hands, you'll transform your nails into a spooky masterpiece that's perfect for the Halloween theme.
Start by applying a black base coat to create the dark, mysterious backdrop for your web design. Once it's completely dry, grab your white polish or silver polish and get ready for the fun part. Using a thin nail art brush or toothpick, draw a small circle in the center of your nail, then create straight lines radiating outward like a star. Connect these lines with curved lines to form your web pattern, varying the thickness to add dimension and allure.
Want to make your simple Halloween nails even more alluring? Add a small spider sticker or paint a tiny spider crawling across your web design. Finally, seal your spooky creation with a clear top coat to protect your nail design and give it an eye-catching shine. This stunning spider web art is surprisingly achievable and guaranteed to draw compliments at any Halloween gathering.
Recommended Products

Luxurious Black and White Dining Table Set: U-shaped polished metal base and gorgeous modern-style tabletop create a sophisticated look with a casual feel. Sitting in a high-back chair will look very elegant. This table and throne black velvet dining chairs are a perfect match for your luxurious dining room area decorating style.

Resin Folding Chair - a stylish padded seating solution for VIP guests at your memorable occasions. Chairs are made of resin material, which is UV stable, resistant to aging, aluminum hardware, ensuring that this chair will stay looking fresh and new for years to come. Whether you need extra seating for a party, a comfortable place to sit during a sporting event, or indoor or outdoor gatherings, the chair is a reliable choice & easy to carry.

Modern & Stylish Design** – These counter-height bar stools feature a sleek linen upholstery and barrel-shaped backrest, adding a contemporary touch to your kitchen island, office, or living space.
Two-Tone Pumpkin Nails
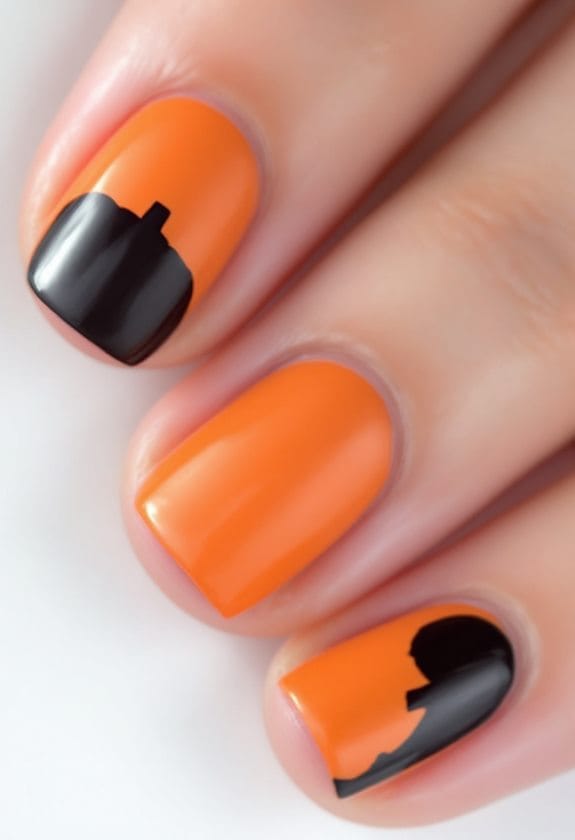
Transform your nails into charming Halloween pumpkins with a striking two-tone design that's both festive and sophisticated. Start by applying a bright orange polish as your base color, making sure to achieve even coverage for the perfect pumpkin backdrop.
Using a thin nail art brush, create curved vertical pumpkin lines on your orange base, spacing them evenly to capture that authentic gourd texture. Choose a stunning contrasting color like forest green or deep black for your accent nails, which you'll use on one or two fingers for visual impact. You can enhance these accent nails with delicate vine patterns or leaves that complement your pumpkin design.
Don't forget to add your personal touch to make these two-tone pumpkin nails uniquely yours. Sprinkle some glitter between the pumpkin lines or place tiny rhinestones at the vine intersections to amplify the festive spirit. Once you're satisfied with your creation, seal everything with a glossy top coat to protect your artwork and add brilliant shine. This versatile design works beautifully for both casual October outings and spirited Halloween parties.
Quick Mummy Wrap Design
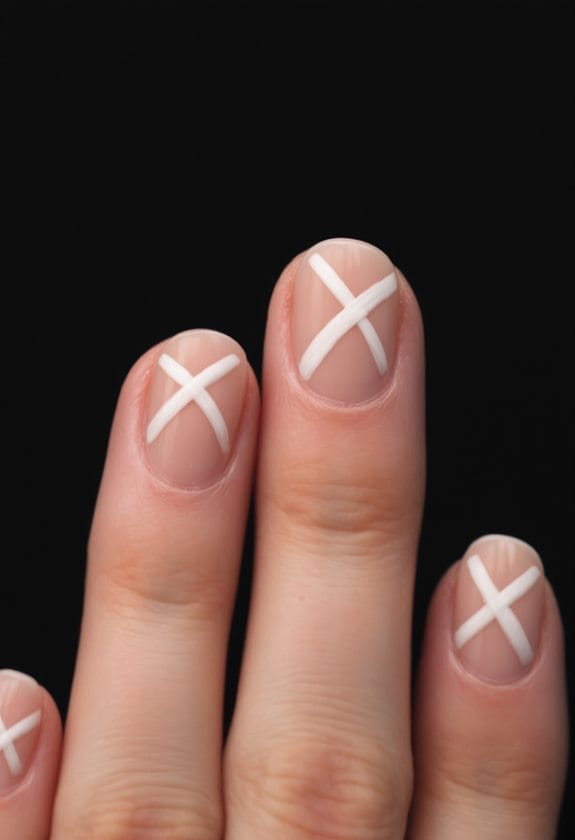
Create spooky mummy nails with this quick and beginner-friendly design that's perfect for last-minute Halloween preparations. You'll be amazed at how simple yet striking this Halloween nail art can be, requiring just a few basic supplies and about 30 minutes of your time.
Start by applying a black base coat to your nails, creating a dark canvas that'll make your mummy details pop. Once that's dry, grab a thin nail art brush or striping tape to create crisscross patterns with white polish, making sure to leave small gaps between the lines for that authentic bandaged look. Add personality to your mummy design by dotting tiny black dots for eyes using a dotting tool or toothpick, giving each nail a playful, spooky look.
For the perfect finishing touch, seal your design with a matte topcoat to create a textured effect that perfectly mimics aged bandages. This beginner-friendly design is incredibly versatile and forgiving, so don't worry if your lines aren't perfectly straight – it'll only add to the wrapped mummy effect!
Frequently Asked Questions
How to Do Easy Halloween Nails?
You'll create spooky designs easily with ghostly patterns and pumpkin accents. Try witchy themes or cobweb nails using stickers. Paint candy corn, skeleton motifs, vampire tips, haunted colors, or bat silhouettes for quick Halloween style.
How to Do Simple Nail Art at Home?
Don't worry about fancy tools! You'll create stunning nail art using home supplies like toothpicks and bobby pins. Start with simple design techniques, experiment with color combinations, and always seal your work with topcoat.
What Nail Art Is Popular in 2026?
You'll find 2026's trendy color palettes featuring neon green and bold oranges, while minimalist nail art with ghostly motifs and creepy crawlers dominates. Textured nail finishes and vintage Halloween styles complete today's spooky-chic manicures.
How to Make Blood Drops on Nails?
Paint your base coat, then use red nail polish with a dotting tool to create drops. Add darker red at each drop's base for depth. You'll achieve perfect Halloween blood drops with a clear topcoat finish.